
Use Proxy SwitchyOmega to configure a Scrapingbypass proxy in Google Chrome. The extension manages the browser proxy; it does not configure a system-wide upstream connection.
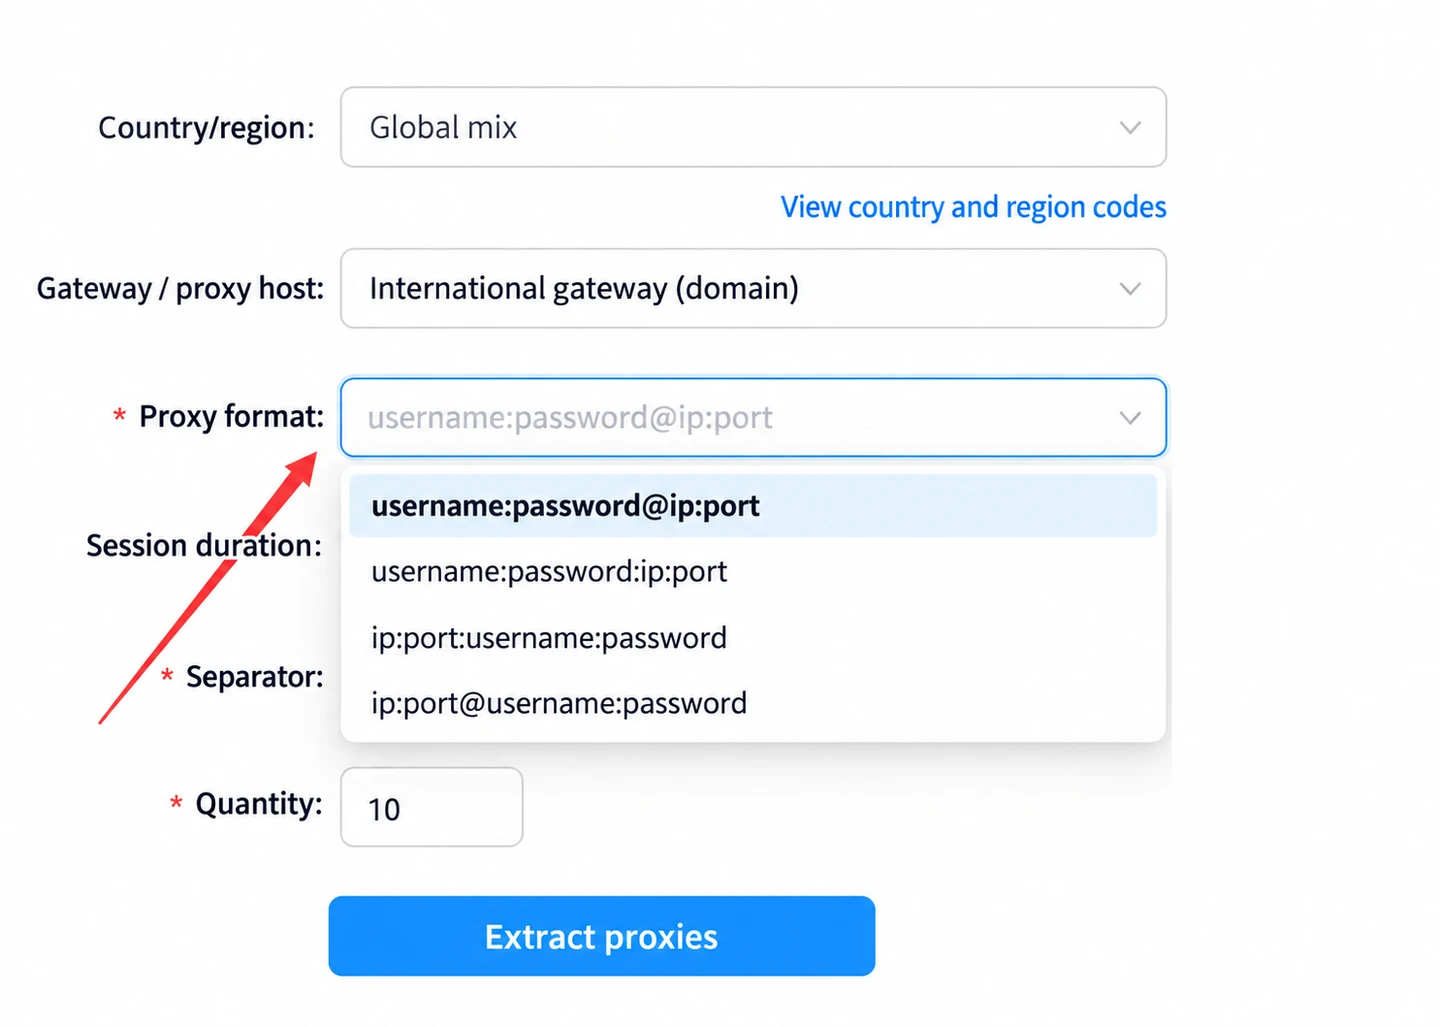
1. Generate your proxy connection details
Sign in to the Scrapingbypass console and select a residential or datacenter proxy plan. For the full extraction workflow, see the residential proxy guide or datacenter proxy guide.
- Proxy network: choose residential or datacenter proxies to suit your workload. Residential proxies use residential exit IPs; datacenter proxies are an option for bandwidth-intensive browsing and data collection. Test the destination before committing to a workflow.
- Location: select the country, region or city your task requires.
- Protocol: Choose HTTP or SOCKS5; use the protocol supported by your application. The protocol selected in the application must match the connection details you generate.
- Gateway: use the generated domain gateway by default. If your console offers an IP gateway and you need it for troubleshooting, use the gateway supplied for that plan.
- Output format: select
ip:port:username:passwordso you can identify the four fields. Do not confuse it withusername:password@ip:port. - Session duration: choose the available duration that fits your task. A longer session is not a permanent static IP.
- Separator and quantity: keep the default separator unless your import method requires another one. Set the quantity after choosing a session duration, then click Extract proxies.
2. Check the host, port and authentication fields
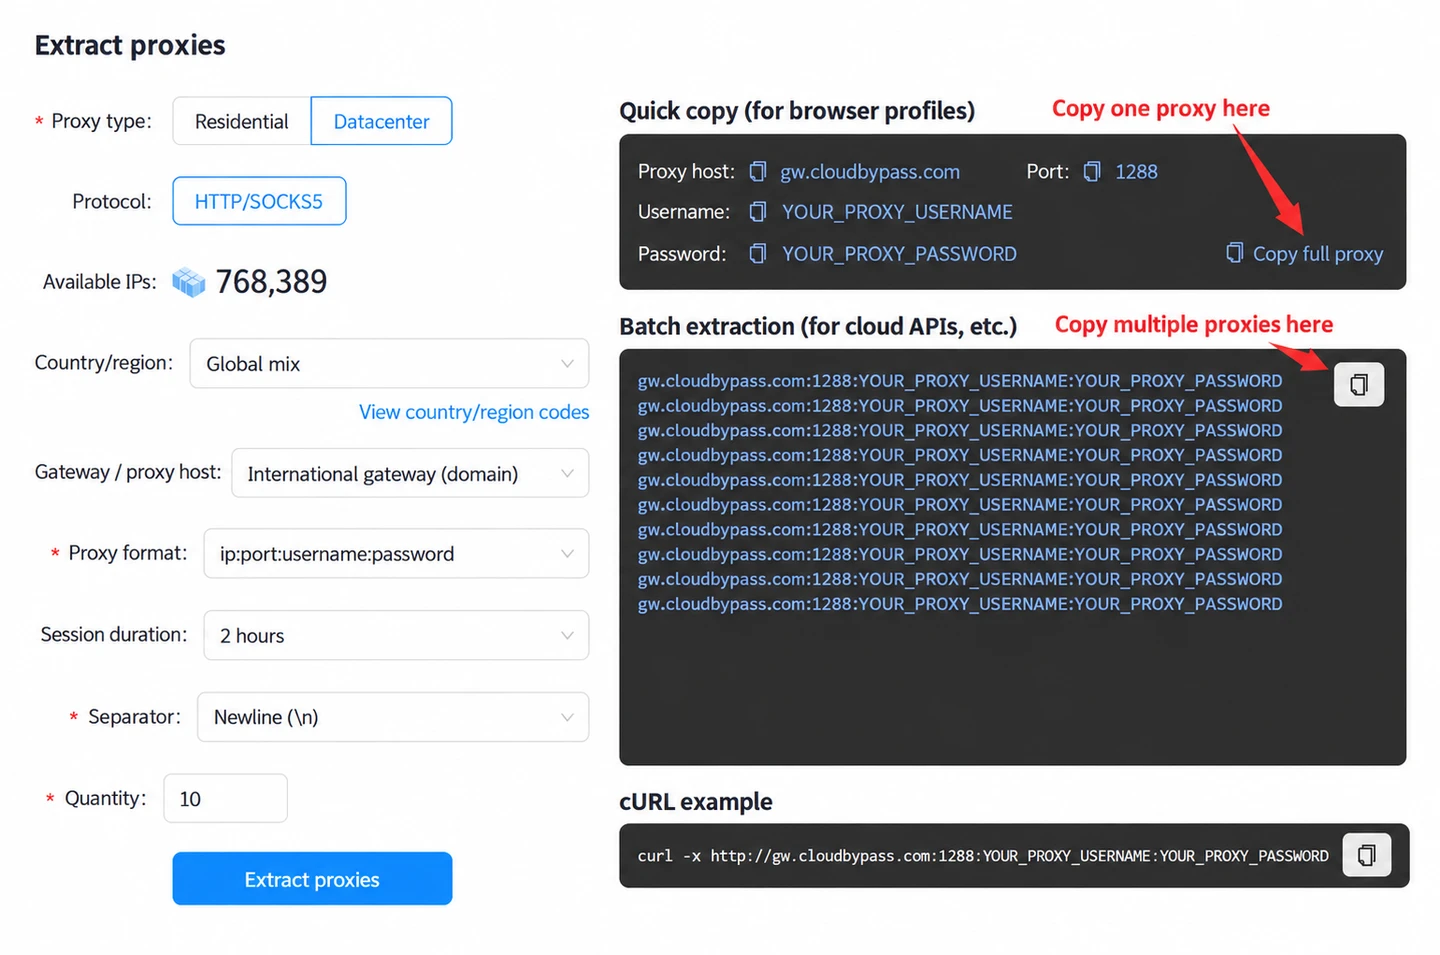
Copy the values from your own extraction result. Quick copy is useful for one proxy; batch extraction provides multiple entries. The following values are placeholders, not working credentials:
gw.cloudbypass.com:1288:YOUR_PROXY_USERNAME:YOUR_PROXY_PASSWORD- Host / server address:
gw.cloudbypass.comin this datacenter example. Use the actual host returned by your console; residential plans may return a different gateway, such asgw-res.cloudbypass.com. - Port:
1288in this example; use the port in your result. - Username: your generated proxy username, including any location or session parameters it contains.
- Password: the generated proxy password, not your console sign-in password.
3. Check extension availability
The original Proxy SwitchyOmega project is no longer maintained. The screenshots document its existing interface; first confirm that a trusted, compatible extension version is available for your browser. Do not disable browser security or assume the original extension can be installed on every current Chromium-based browser.
If you already have a compatible installation, continue with the profile steps below. If it is unavailable, use a supported proxy client or another documented configuration method rather than downloading an unverified copy.
4. Create and authenticate the proxy profile
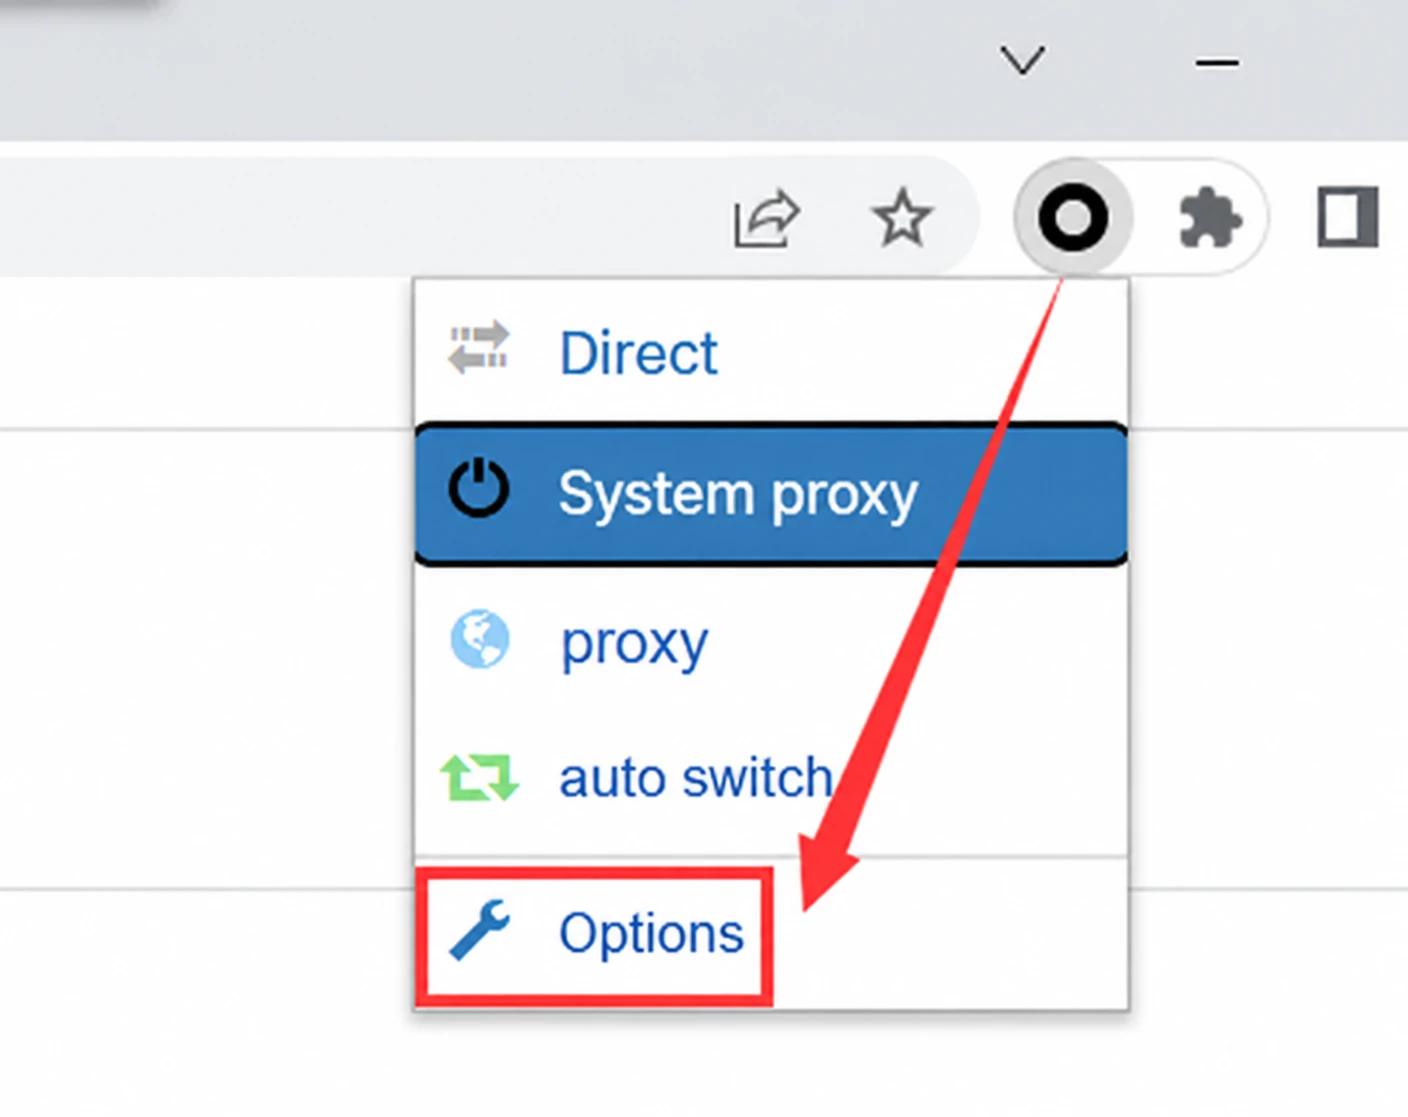
- Click the extension icon in the browser toolbar and select Options.
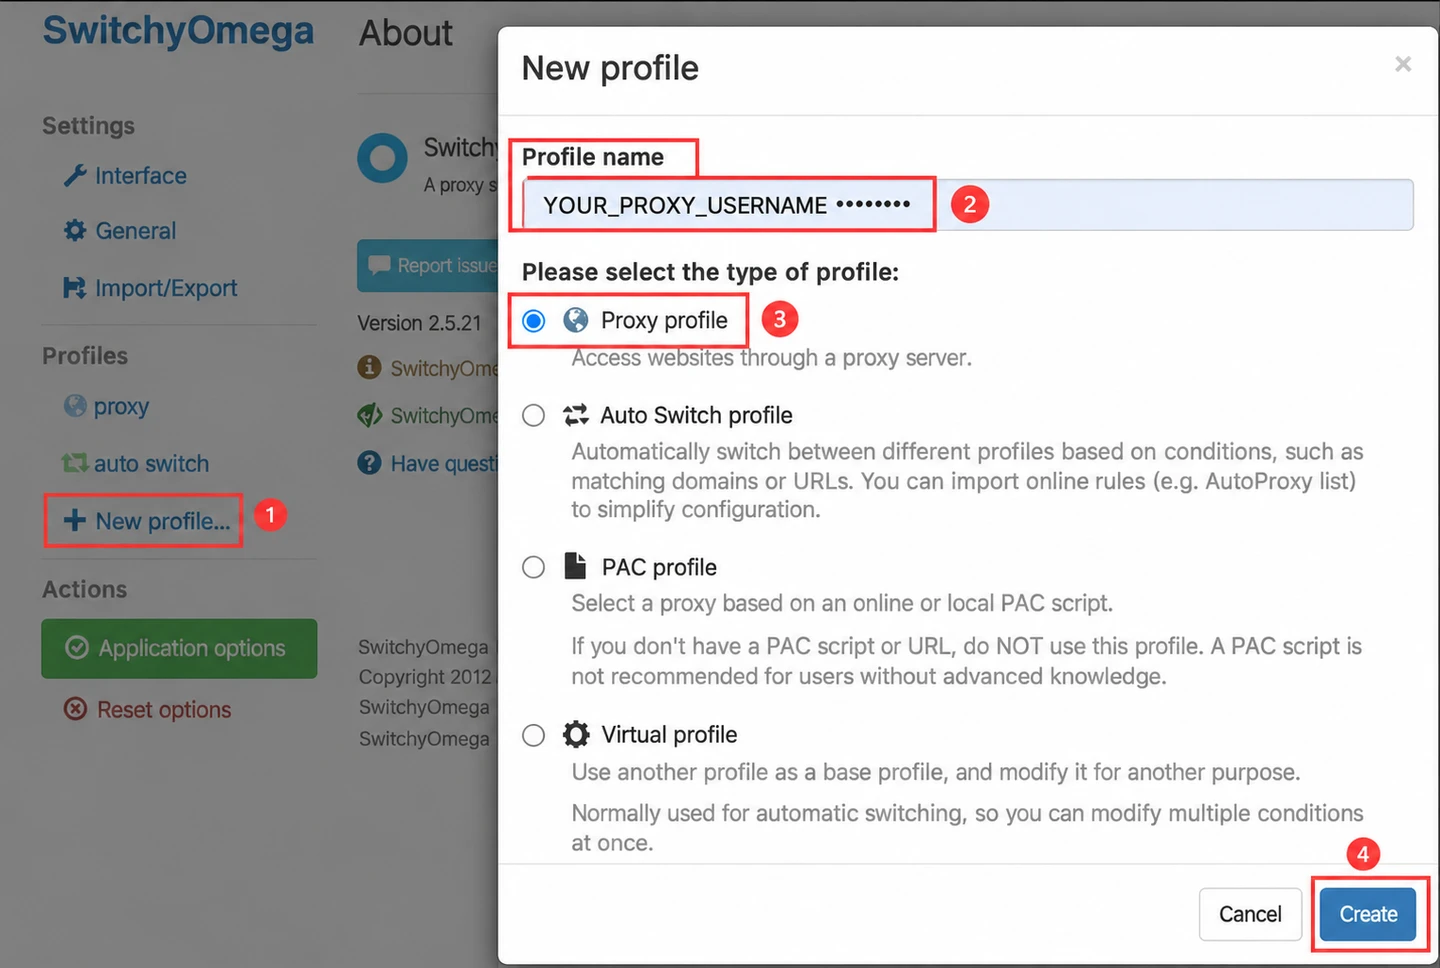
- Choose New profile, or edit the existing proxy profile. Enter a recognizable name, select Proxy profile and click Create.
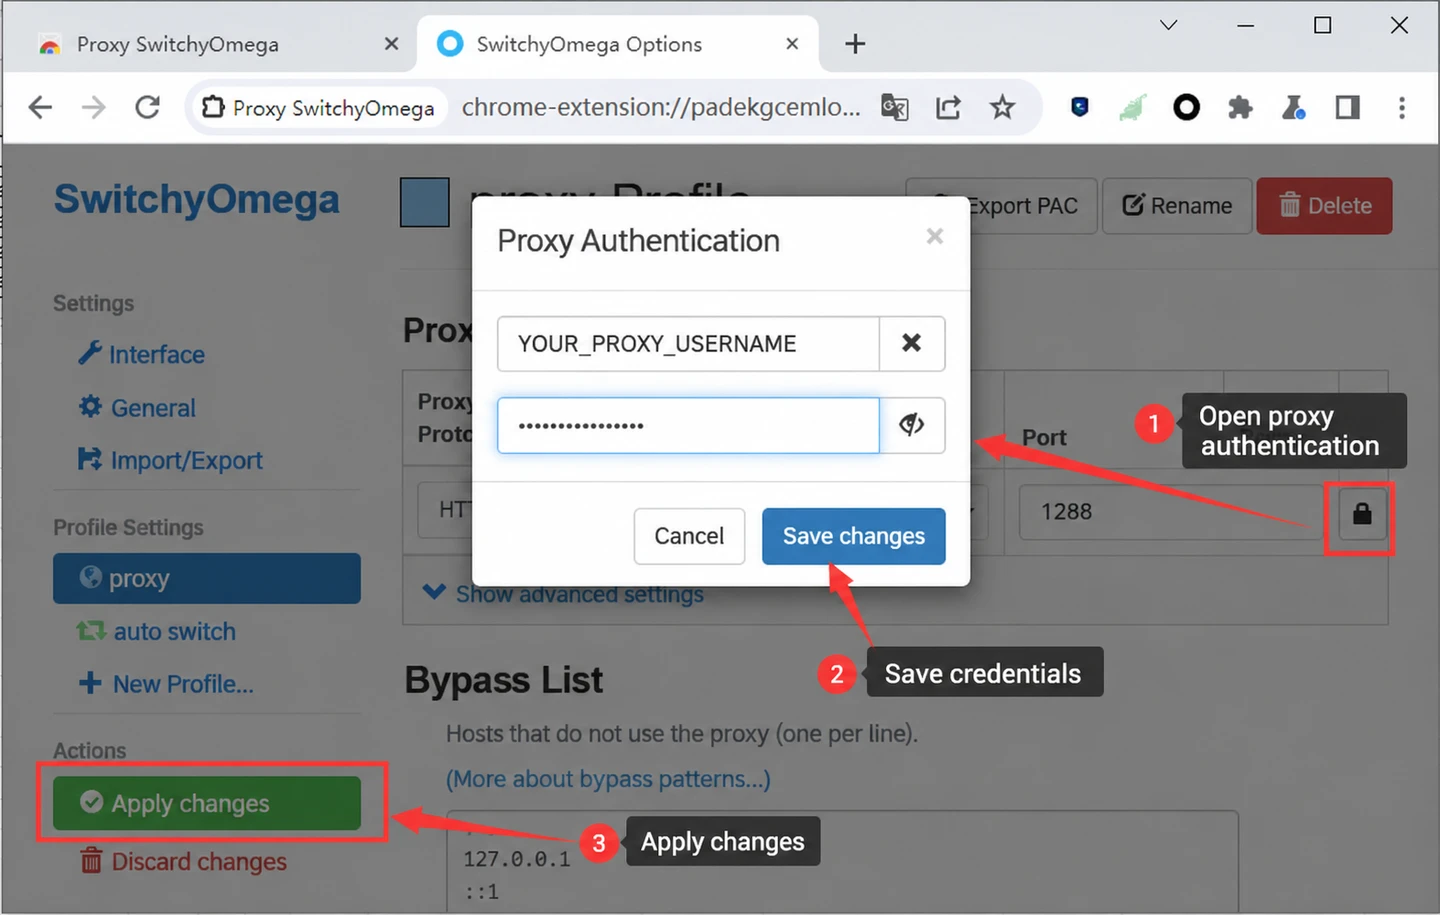
- Set the proxy protocol to HTTP or SOCKS5, matching your generated connection details. Enter the gateway in Server and the generated port in Port.
- Open the authentication dialog using the lock icon. Enter the generated proxy username and password, then save the credentials.
- Click Apply changes in the left-hand sidebar.
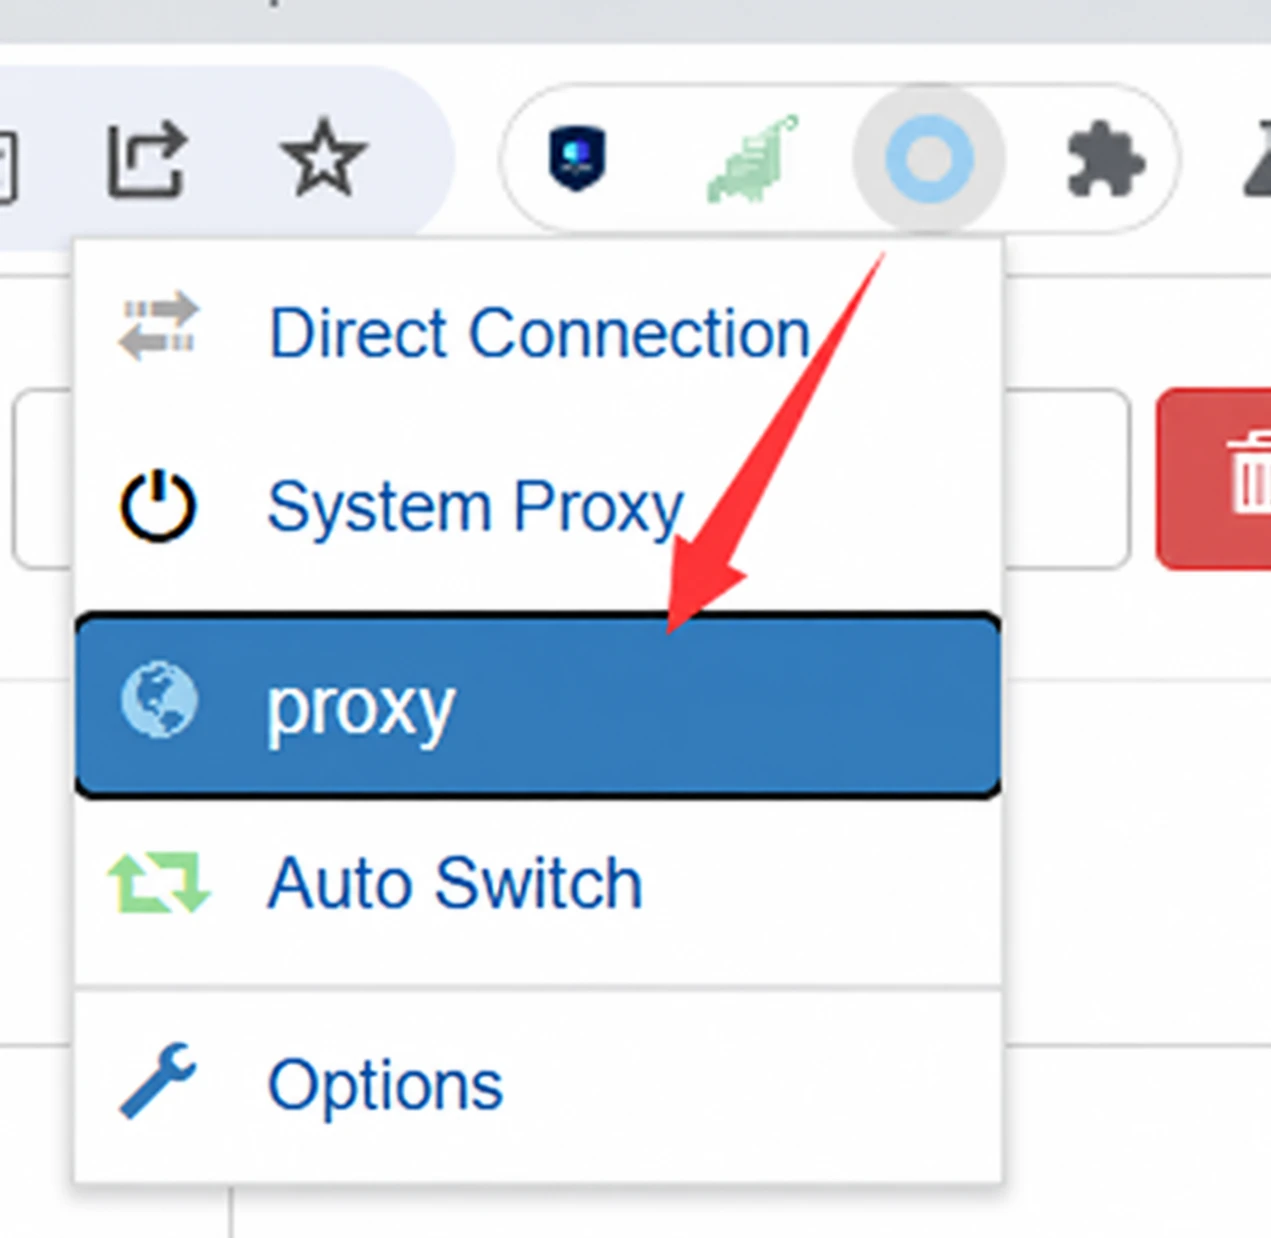
- Open the extension toolbar menu and select the profile you saved. A changed icon indicates that the profile is selected; verify the exit IP and destination from inside that browser.
Verify the connection and troubleshoot
- Save the configuration and start the application or browser profile. Check the public exit IP from inside that profile or the app that should use the proxy, then open your intended destination.
- If authentication fails, re-copy the generated proxy username and password without spaces. Keep the entire username, including its session and location parameters.
- If the connection times out, check the host, port, protocol, proxy balance and any required upstream route. Test the phone, emulator and desktop environment separately.
- A VPN icon, a changed extension icon or a successful proxy check confirms only part of the connection. It does not guarantee that every website will accept the session or that a later request will succeed.
- Keep credentials private. When requesting support, share the application version, protocol and a redacted error message, not your proxy password.